Yamahasrx700
Member
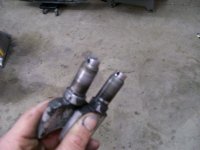
I just repaired my power valves (all 3). Just thought you may be interested. The first one took 25 minutes. The other two about 10 minutes. I did it on a 1952 Craftsman (Atlas) lathe with a 4 and a 3 jaw chuck. I can post the pictures of the process if anyone wants them.
Attachments


did you weld it or use a bolt? ive done some welded but they didnt last. the ones ive had done with a bolt in the end are indestructable..
if you did them with a bolt, make sure to smooth the edges good or it can cut into the cable.
i always thought maybe threading the hole as well and using two set screws to jamb the cable end in place might make the cables last longer too. just never spent the extra on the machinist to do it.
if you did them with a bolt, make sure to smooth the edges good or it can cut into the cable.
i always thought maybe threading the hole as well and using two set screws to jamb the cable end in place might make the cables last longer too. just never spent the extra on the machinist to do it.
Yamahasrx700
Member
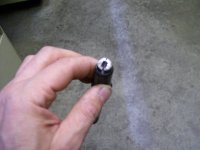
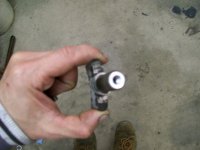
I used a 5/16 stainless bolt and radiused the slot also to minimize chaffing of the cable. I think if to jamb the cable you would put more stress on the cable because instead of rotating a few degrees you would now be bending the cable. Just my 2 cents. I would rather go through a cable then buy power valves, thats why I did it his way. If the cable pulls through the stainless I think I have bigger problems.
Yamahasrx700
Member
I will try to post the rest of the pics tomorrow. I received quite a few requests.
the guy i have do them gets 30 each, not bad when new are over 80
Yamahasrx700
Member
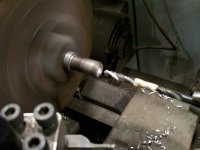
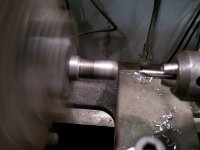
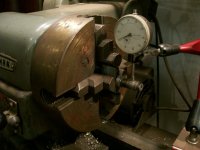
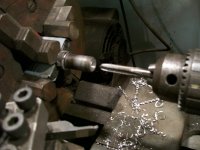
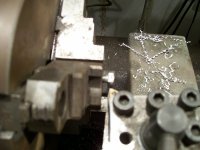
Here are a few pics of the process. Indicate,machine off the top hat, center drill, drill.
Attachments
Yamahasrx700
Member
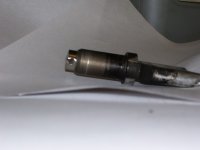
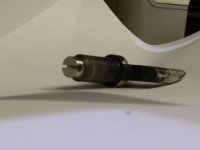
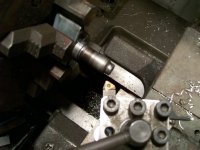
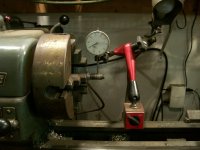
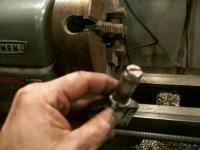
A few more pics. Tapping, Indexing the bolt, machining the bolt to .472. I did not include the pics of drilling and slotting. Slot was done with a hacksaw.
Attachments
daman
New member
cool good job...
Yamahasrx700
Member
If anyone is going to throw away bad power valves, I will do my civil duty and take them off your hands. That way they will stay out of the landfills.
How much would you charge a piece to do a handful of them for the rest of us (we supply the valves)?
RIVERRUNNER
Active member
I maybe interested ^^^^")
rx1jim
New member
YamahaSRX,
This is exactly the process I had in mind, glad to know it works. Your repaired power valves are a much better design than the originals. I am going to be sure I cleam my valves after every major ride (500 miles of more). This way they operate smoothly and put les stress on the cables. Excellent work and thanks for sharing the info.!!
This is exactly the process I had in mind, glad to know it works. Your repaired power valves are a much better design than the originals. I am going to be sure I cleam my valves after every major ride (500 miles of more). This way they operate smoothly and put les stress on the cables. Excellent work and thanks for sharing the info.!!
Hey I just fixed mine too thanks for the good info
Stephfg
New member
So did I. Thanks for the idea and write up!
Yamahasrx700
Member
I have alot of inquiries about the process i have been using. Here it is. $20 each valve.
orchie18
Member
Had a machinest put in stainless steel bolt as per bethevipers suggestions. The machinest down the road charged me 25 buck for all three. Said he could justify charging me anymore. Easy job for him i guess, just got to be set up better than the generall tinkerer.
Yamahasrx700
Member
Who is the machine shop. Maybe I can send him the ones I am too busy to repair.